Estimated processing time before shipment is listed on each product page by the 'Add to Cart' button. Most processing times are 4-7 business days, but may be higher or lower depending on the product. Processing time is how long it will take us to reach your order in the queue, THEN your order will ship using your chosen shipping method. Weekends are NOT business days. Thank you for your patience during our busiest time of year!
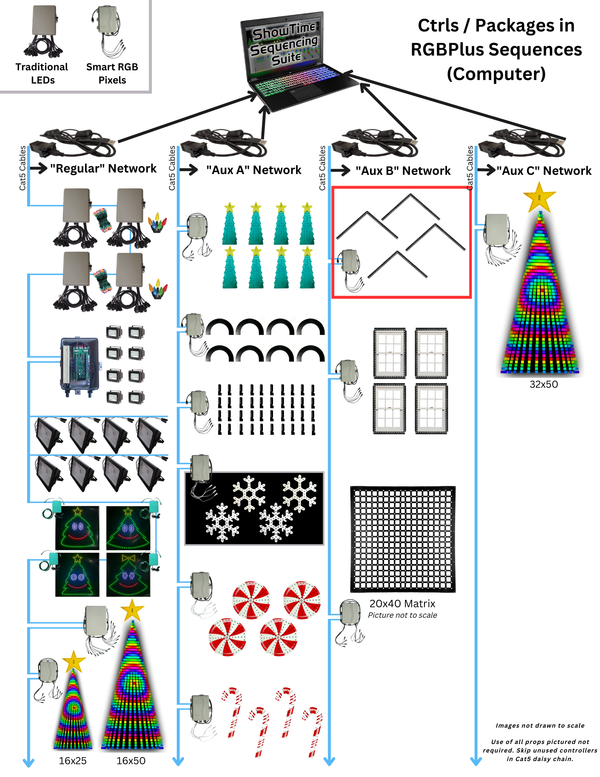
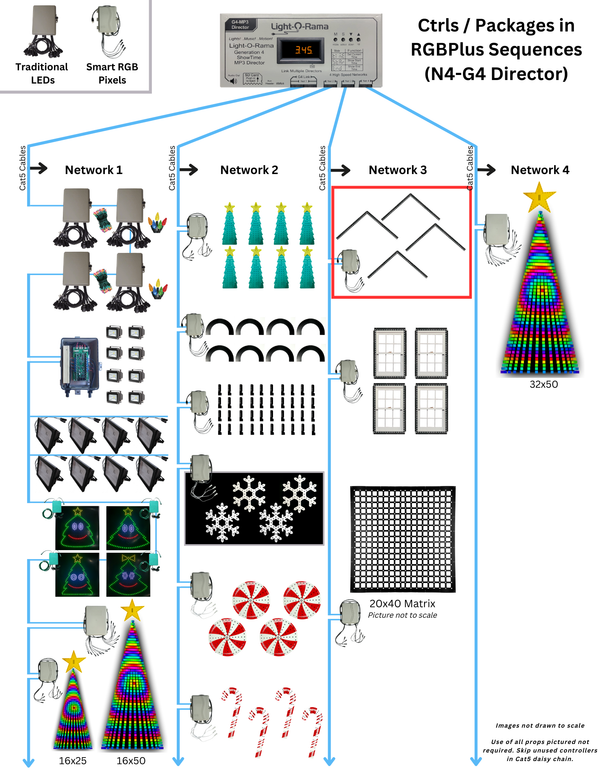
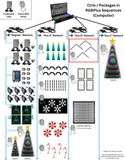
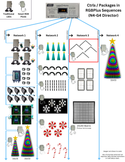
For non-modified use with RGBPlus sequences, the controller in this package must be connected to Network Aux B/Network 3. Each network in your show requires a USB485-HS Adapter (computer show) or an available port of a Showtime Director.
Our "CPC" packages include the "Coro, Pixels, and Controller" you need to easily add smart pixel props into to your display. These packages can be connected to an existing network of Gen3 Light-O-Rama Controllers, or used on a separate network within the same show. A Cat5 cable is required to connect this controller to existing controllers in a multi-controller network, or a computer/showtime director if it is the only Unit in the show.
S5.6.8 or higher is recommended for easiest use; a Pro license level is required to use Pixel Motion Effects.
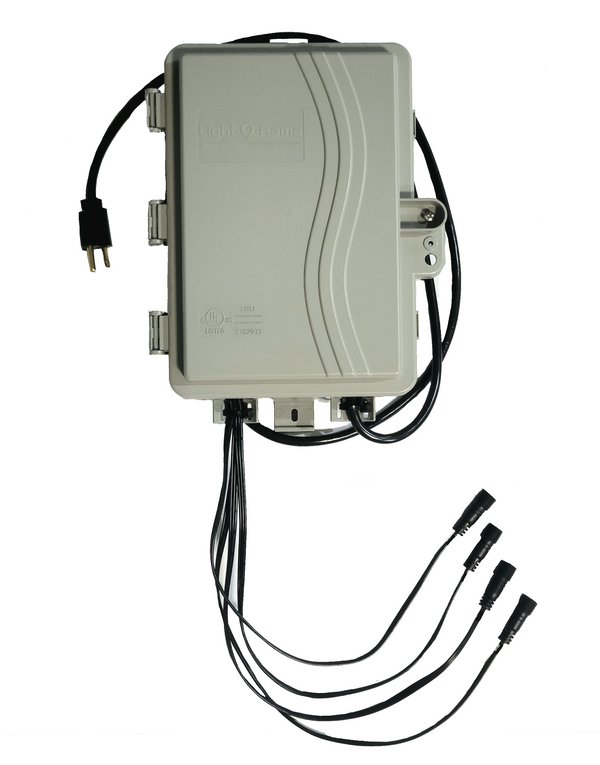
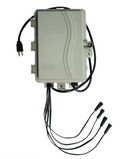
The Assembled Pixie4 controller includes the controller board and power supply wired and mounted in a weather-proof, ventilated and UL listed enclosure. The power supply is UL listed: MeanWell RSP-150-12 - 120/240V input - 12V - 12.5A output - with Power Factor Correction and extend temperature operating range. This is a 12 Volt controller system compatible with 12V RGB smart pixel strands and devices. Dumb RGB devices or standard LED / Incandescent lights cannot be plugged into the ports of this controller.
Included in this Package:
8 Strands of Pixels - 50 Ct (4" spacing)
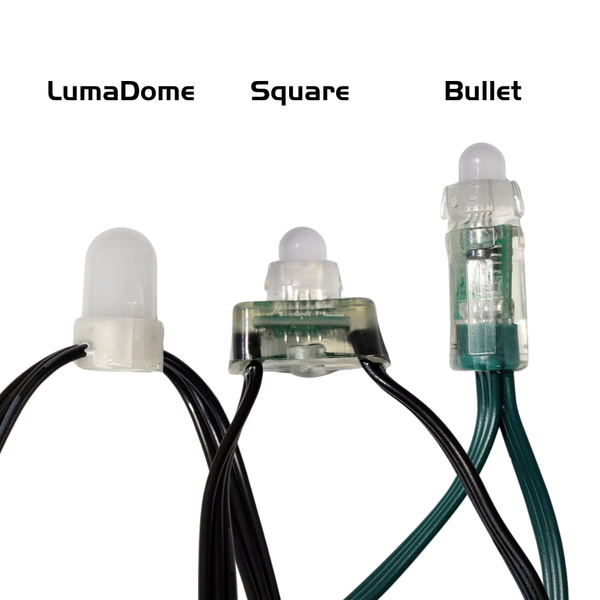
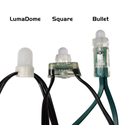
Choose Black Bullets, White Bullets, Black Squares or White Squares
Strands connect together to create 4 sets of 100
Pixie4 Controller - Assembled -12V - With LOR Dangles Included (Black or White)
Optional Additions:
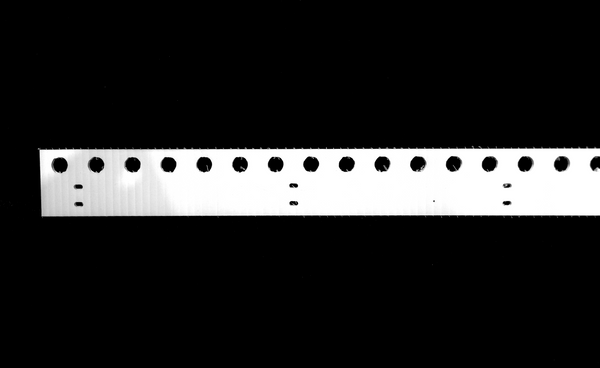
Pixel Mounting Trim - Node Spacing 1" (White Or Black)
4mm Coro - 4' Sections (White or Black) - Easier to push pixels
UV Stabilized Plastic - 7'9" Sections (White or Black) - More Flexible and Rigid
4 Pixel Extensions - White or Black (5ft, 10ft, 15ft, or 25ft)
Cat5 Cable (10ft, 25ft, 50ft, or 100ft)
Not Included:
Mounting Material (Including but not limited to:)
PVC Pipe
EMT Conduit
Clips or Brackets
Zip Ties
Our CPC packages can be used in a display with custom sequencing as long as the controller's Unit IDs do not conflict with any other Unit ID assignments on the network, and network limits have not been exceeded. Do not exceed 25ft of pixel extension before reaching the first pixel of a strand on each Pixie4 port for best results.
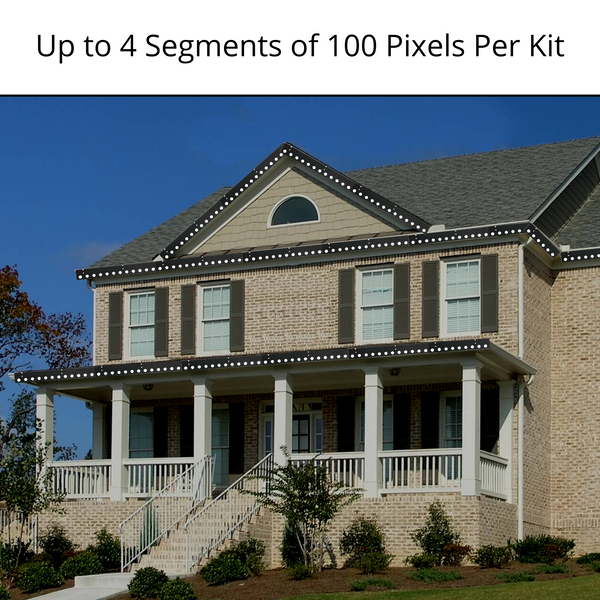
If you want more than 4 sections of 100 pixel rooflines but still want to use our RGB Plus Sequences, just put multiples of this kit into your cart and make sure each Pixie controller uses the SAME Unit IDs when you set up your display. Read more about our sequences in the RGBPlus Sequence tab.
Package Assembly
Pixels are not pre-pushed. Assembly is to be completed by the customer. Select options for Pixel Mounting Trim based on 2" or 3" spacing. If you need to purchase a custom length of Pixel Mounting Trim, just add more 4mm Coro Mounting Trim or UV Plastic Mounting Trim to your cart.
What can your display look like with our CPC Packages? Take a look!
To use the Roofline CPC Package with our RGBPlus Sequences, the Pixie4 controller in this package must be connected to the AuxB network on your computer or Net 3 of your N4-G4 Showtime Director. The Pro license level is required to play RGBPlus sequences. The software version required is listed on each RGBPlus sequence purchase page.
The Pixie4 should be given a base Unit ID of 82; The four Unit IDs for the four ports of this Pixie4 controller (and therefore your roofline segments of 100 pixels) must be 82, 83, 84, and 85, both physically on your controller and in your Preview,which correspond to ports 1, 2, 3, and 4 of your Pixie4. Learn how to set the Unit ID of your Pixie controller using DIP switches by clicking here.
For use with RGB Sequences, rooflines should be oriented with the first pixel on the left when viewed from an audience vantage point. Roofline segments can either be straight, over peaks, or along multiple curves in your home. As long as there are 100 pixels per segment, no sequence modification is required. Sequences are designed to work with 2, 3, or 4 roofline segments (2, 3, or 4 ports total used on your Pixie4).
Learn more about using these props with our RGBPlus Sequences, altering networks/Unit IDs, or changing the number of pixels per roofline by clicking here.
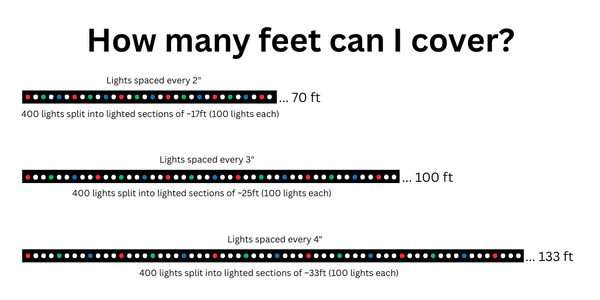
Our standard roofline package allows you to decorate approximately 68 feet (2" spacing), 104 feet (3" spacing), or 133 feet (4" spacing) of your home. Each of the four roofline segments in our RGBPlus sequences has effects for 100 pixels. The maximum length our default 400 pixels will reach at 4" spacing is 133 feet.
If you do NOT want to modify sequences and just want everything to 'work out of the box,' you must use the default 100 pixels per 4 sections. (133' feet max; 33' per section).
If you feel comfortable modifying the pixel counts in your rooflines in the preview editor, you can use custom amounts of pixels per section (i.e. 62, 83, 97, etc.). The sequencing effects in our RGBPlus sequences will resize to only use your custom amount of pixels after you make the changes. This requires RGBPlus preview/sequence modification.
If you would like to add pixels per section (up to 150 total per strand instead of 100), you can add additional strands of 50 pixels to your cart in addition to more pixel mounting trim to reach a total of 200 feet at 4" spacing. This requires RGBPlus preview/sequence modification. If you need to decorate more than 200 feet, you will need an additional controller; this will also require preview/sequence modification.